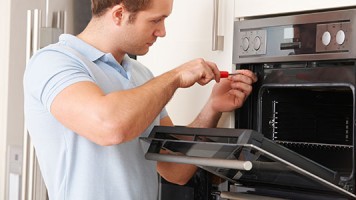
Freezer fine but fresh food section coils iced over. Tested defrost sensor seems fine. COULD NOT LOCATE DEFROST HEATER. All the wiring in the nearby Molex runs wires to damper door and evaporator fan which both were working.
Model Number
wrx988sibw01
What have you tried so far?
Defrosting and tested defrost sensor.
Request Resource Materials
Service diagnostics guide, Videos
- Guest asked 9 years ago
Hello
This #12729128 defrost heater is located under the evaporator. Look at parts diagram link below on page #12. Matt Ace technician
- AV Repair Help answered 9 years ago
- last edited 9 years ago
-
Hello There is not a heater for the FF section evaporator. The refrigerator maintains 38-44 degrees. When the control board cycles off at 3-44 degrees , the evaporator defrosts manually on temperatures alone. No need for a heater if coil temperature is above 32 degrees.
-
So the unit probably needs a new control board if the fresh food section coils are all iced and not defrosting for several days now?
-
Did you run it through diagnostics ? Is there any error codes ? If no error codes I would replace board and Fresh Food thermistor
-
I didn’t know how to how to get this module into diagnostic. Would instructions be on the back? I didn’t see a kick plate manual. By board you mean control board not power board right?
-
The complete diagnostics are above in the link . To Enter Service Diagnostics Mode: Refrigerator must not be in lockout mode prior to entering Service Diagnostic mode. 1.Press SW1 and SW2 simultaneously for 3 seconds. 2.Release both buttons when you hear the CHIME indicator. The display will show “01” to indicate the control is in Step 1 of the diagnostics routine.To Exit Service Diagnostics Mode, Choose One of the Following Options:■Press SW1 and SW2 simultaneously for 3 seconds.OR■Unplug refrigerator or disconnect power.OR■Allow 20 minutes to pass.Following the exit of the diagnostic mode, the controls will then resume normal operation.NOTES:■Cooling diagnostics are Service tests 1 through 7 and 32 through 39. ■Dispensing diagnostics are Service tests 8 through 31.■Each test must be manually advanced. ■Press SW5 to move to the next step in the sequence. ■Press SW4 to back up in the sequence to the previous step. ■Diagnostics will begin at Service Test 1. ■Each test is displayed in the 2 digits of the dispenser user interface display. ■The test results are displayed in the 2 digits on the dispenser user interface and display 2 seconds after the test number is displayed.An amber “Order Filter” light will be shown to designate that the test number is being displayed, and a red “Replace Filter” light will be shown to designate that the status of the test is being displayed. ■All button and pad inputs shall be ignored and all inputs shall be off except as described in the actions for each test.Service Test – 1: FC Thermistor■The board will check the resistance value of the ther. Service Test – 2: RC Thermistor■The board will check the resistance value of the thermistor and display the results on the Temp display (01 = pass, 02 = open, 03 = short).Service Test – 3: Evaporator Fan and Air Baffle Motors■Control the RC and FC evaporator fan motors by depressing SW3 (01= both fan motors off. 02 = FC fan on).■Depress SW3 once to advance. Service Test 3 will flash quickly and advance to tests 13/23 very quickly. The result is RC fan on, pantry air damper on. Pantry air damper will open and close automatically (13 = damper open, 23 = damper closed). Verify airflow inside pantry on left-hand side when damper is open (13 displayed). Airflow in pantry will cease when “23” is displayed.■Depress SW3 to advance to last step (04 = both RC and FC fans on).Service Test – 4: Compressor/Condenser Fan Motor/Evaporator Fan■There will be a delay of 3 seconds before start of Sub Step 01. NOTE: Each test is timed and will automatically proceed to the next step. User will not be allowed to exit test. If exit is attempted, an invalid chime will sound.■Control the sealed system loads by selecting
- 1 more comment
- You must login to reply
Your Answer
Please login first to submit.


