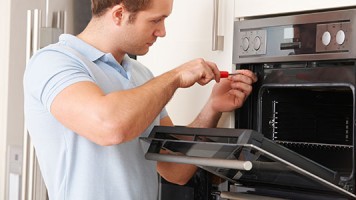
If the compressor is running check the Thermistors . If the thermisters chk out then go you may have a sealed system issue see diagnostics below. See videos on refrigerant leaks .We work on these all the time those main control boards are a big issue as well as low on Freon so check both but if the compressor is not running most likely it’s in your board there are two boards one in front of the unit display one in the back by the compressor left side it is very difficult to get to.
In the past we have changed the front display it works but end up going back and changing the back board as well
https://www.appliancevideo.com/?s=sealed+system&cat=&tag=&post_type%5B%5D=post&post_type%5B%5D=premiumvideos&post_type%5B%5D=fromthefield&post_type%5B%5D=embdvideo
The wine cellars, beverage centers, and refrigerated drawers utilize two thermistors: one is known as the evaporator
thermistor and the other as the display thermistor. Each thermistor has a different function for input to the electronic
control.
Evaporator thermistor (part number 41050057):
The evaporator themistor turns the unit on and off. It is secured to the evaporator or cabinet liner.
Display thermistor (part number 41050058):
The display thermistor is connected to the LED display and displays the temperature inside the unit on the display
panel.
The following will happen in the event of one or both thermistors fail:
1. If the evaporator thermistor fails, all loads will be shut off and the unit will not run.
2. If the evaporator thermistor senses temperature outside of 0-140 degrees F, all loads will be shut off and the
unit will not run.
3. The display panel will flash E3 for an evaporator thermistor failure and E4 for a display thermistor failure. If
both thermistors fail, the error codes will be displayed sequentially. An audible alarm will also sound six times
every minute if either one or both thermistors fails.
The thermistor can be checked by use of a multimeter with the ability to read resistance. To check the thermistor:
1. Disconnect and remove thermistor from unit.
2. Use a reference temperature point that is know (such as an ice bath) and measure the resistance across the
wire leads.
3. Compare the recorded resistance with Table C.
If measured resistance falls outside the resistance given in Table C within 4% of the value, the thermistor is bad and
will need to be replaced.
Table C: Resistance versus Temperature Chart
Temperature (C) Temperature (F) Resistance (K-OHMS)
If the thermistor has been tested and is found to be good, check the temperature of the evaporator plate and the
resistance of the thermistor. If the temperature of the evaporator plate does not correspond to a proper resistance
from the thermistor, check for a proper and secure connection of the thermistor to the evaporator plate bracket.
12
Use a leak detection system that will detect R-134a refrigerant. Leaks need to be found on any leaking system
BEFORE the repair takes place.
2. The drier must be replaced anytime the sealed system is opened. Always use a MARVEL drier. Failure to do so
may cause repeated system failure in the future.
3. Limit time the system is opened. DO NOT EXPOSE THE OPEN SYSTEM FOR MORE THAN 15 MINUTES. This
will result in sealed system failure. Leave replacement parts sealed and/or pressurized until ready to install.
4. The compressor must be replaced if there is a low side leak. Moisture has been drawn into the system if the
unit has been running for an extended period of time. Be sure to flush the system with dry nitrogen gas and
evacuate to 50 microns before re-charging (see Section 2.2, Low Side Leaks).
5. A new evaporator assembly must be ordered if the capillary tube is found to be plugged or severely restricted.
Restrictions cannot be flushed out.
6. Be sure to purge the system with dry nitrogen gas after final brazing. This will flush out any air or moisture that
may have entered the system before being absorbed into the ester oil.
2.2 Low Side leaks
Low side leaks consist of a break in the system at the evaporator, low side (suction) return line, or accumulator. If a
leak is found in any of these areas, moisture has probably entered the system. The compressor and drier will have
to be replaced and the system will need to be flushed thoroughly with nitrogen gas and evacuated to 50 microns
before re-charging.
2.3 High Side Leaks
High side leaks consist of a break in the system at the condenser, high side tubing, drier, or capillary tube. If a
leak is found in any of these areas, the system can be flushed with nitrogen gas, evacuated to 50 microns, and recharged.
2.4 Restricted Capillary Tube
Moisture or other contaminants that enter the system can cause deposits in the system. These deposits will usually
collect in the capillary tube and form a restriction that cannot be completely removed by flushing. If the capillary
tube is found to be restricted, the evaporator, compressor, condenser, and drier should all be replaced.
2.5 Access Valves
A temporary access valve can be used to service or evaluate the system. From these access valves, you can evacuate,
charge, and recover the system. The access valve can be installed on the compressor’s process tube (this will
also be a low pressure side). Be sure to cap off access valve while servicing. This will prevent contamination of
the sytem and/or refrigerant from leaking. After servicing, the access valve should be removed. A pinch-off tool
can be used to close the system to remove the access valve and then braze the hole for the access valve to seal the
system. Be sure to leak check after brazing.
3
- AV Repair Help answered 11 years ago
- last active 11 years ago
If the defrost sensor is open, the coils will frost up. A blocked drain will also cause this. The system is probably not low on refrigerant with that amp draw, but this is something you must see by looking at the frost pattern yourself after the unit has been running for 10 minutes on a clear evaporator. This ice maker had a loop of the coolant line running through it. If the customer was chipping away at the ice or removed the ice maker improperly, they may have also damaged that refrigerant line. If that is the case see the series of videos in the link below for additional help https://www.appliancevideo.com/appliances/samsung-rf263teaesr-refrigerator/
- AV Repair Help answered 11 years ago
Hi. It does not sound like the main control board is at fault. The ice may be related to your temp issue. Find out why the evaporator is freezing up. This can be from a frozen drain tube or a defrost issue. Both of which can block air flow from the evap fan causing food near the evap to freeze and temps in the upper section of the frige to be too warm. I have attached a link for the Repair guide on this unit. Start on page 307 to help you with figure out the temp issue, and ice issue. Take a look at the tech sheet I have attached also. You can check to see if there are any stored error codes as well as put the unit into a defrost cycle and check different components. Test your freezer sensor and evap sensor first before replacing the board. Take a look at the link I have attached for our Samsung refrigerator repair videos also. There are many videos on this issue you are having.
- Brian, Ace Appliance answered 11 years ago
I see that it shows the electronic defrost control instead of a timer which your unit has. I found another tech sheet for a similar unit that shows a timer. I have attached it for you. It does not show the fan running off the switch either. Does the compressor run as well during defrost or just the fan? You could have a shorted thermostat.
- Brian, Ace Appliance answered 11 years ago
The 2 bottom videos in the link I attached shows igniter repairs in similar unit.
- Brian, Ace Appliance answered 11 years ago
Sounds like a bad igniter. Do you have power to the igniter in a bake cycle? 120V.? Does the igniter glow in a bake cycle?
- Brian, Ace Appliance answered 11 years ago
Hi. I have attached the tech sheet on this unit for you. It looks like the freezer door switch controls the ice maker and light, but does not control the fan. It gets is power from the adaptive defrost board. I would have thought replacing that would have fixed it for you. Let me know what you find out or if you need any further help.
- Brian, Ace Appliance answered 11 years ago
Hi. I have seen this issue many times before. It is an issue with the water temperature switch. p#W10179666. You can sometimes unplug the unit, then unplug the wires from this switch and plug them back in and it will reset it. You can try this to verify its the issue. It may not last long before it acts up again.
- Brian, Ace Appliance answered 11 years ago
Look at page 20 of the service manual I attached. I have also attached a Bosch error code sheet for you oven as well. Take a look at this too. Neither one show an error code of F02. Is that the correct error code you are getting? Any other error codes? Run the diagnostic mode in the service manual to find error codes.
- Brian, Ace Appliance answered 11 years ago
OK. There are a few things that can cause this. First of all, was this in s self clean cycle and that’s how the door was locked? There are thermal fuses that can go bad during self clean causing this to happen. You could also have an issue the the door latch or control board. I have attached the service manual for a similar model. IT should work for the most part for your unit as well. Page 9 talks about the door latch and it being able to be tested in diagnostic mode. Starting on page 21, it lists the error codes and explains how to access diagnostic mode. You will want to check your error codes and run a diagnostic mode to test your components and go from there.
- Brian, Ace Appliance answered 11 years ago
Ok. I have found and attached the service manual for you on this unit. First take a look at page 9. Follow the steps to check error codes. You may find an error code as to why the ice maker is not working. Next take a look at page page 22. It states there is a test button on the bottom of the ice maker. When this is held in for a few seconds the ice maker should start a cycle. Page 22-25 explain more on ice maker operation. Page 37-38 shows you how to take ice maker out and test components on ice maker.
- Brian, Ace Appliance answered 11 years ago
Hi. I have attached the service manual for your unit. Look at page 125. It gives all the instructions on how to disassemble the dispenser. Let me know if you need any further assistance.
- Brian, Ace Appliance answered 11 years ago
Hi. Check the arm on the ice maker. Once the ice fills in the bucket the arm should rest on the ice and not come all the way back down. This shuts the ice maker off until the level of ice goes down causing the arm to drop back down. If the arm is in the off position and it is still making ice then you have a bad ice maker. The most common reason for low water pressure would be a clog in the valve that feeds the water line to the refrigerator. If you water supply is low at the dispenser then it most likely is at the ice maker as well, which could be causing your ice maker issues. Small or hollow cubes are signs of low water pressure to the ice maker. A water filter that has not been replaced can cause low water pressure, as well as a clogged inlet valve.
- Brian, Ace Appliance answered 11 years ago
Hi. Please double check that model number. Nothing pulls up when I search that model number or even a partial number. Is this an older unit? On some models the insulation may be serviceable and others may not. The insulation could no longer be available. With the correct model number I will be able to find out for you.
- Brian, Ace Appliance answered 11 years ago
HI. The fill tube for your ice make can be freezing up for a couple of different reasons. Low or slow water pressure can cause the valve to not close all the way which causes a slow drip to the ice maker which freezes up the fill tube. So make sure you have good water pressure. If so I would replace your valve. If warm air is getting into the freezer condensation can build up in the fill tube and cause this as well. Make sure door seals are sealing good and warm humid air is not able to enter anywhere else. I have attached a video on replacing the valve. Just let me know if you need any further assistance.
- Brian, Ace Appliance answered 11 years ago
I think you have have a bad micro dispenser switch or auger motor issue.
- AV Repair Help answered 11 years ago
- last active 11 years ago
See video link
https://www.appliancevideo.com/?cat=&s=lg+washer+no+drain&post_type%5B%5D=post&post_type%5B%5D=premiumvideos&post_type%5B%5D=fromthefield&post_type%5B%5D=embdvideo
Is the pump running? If it is I suspect bad pump/ loose impeller
The appliances made overseas often switch their components on and off through the neutral only, everything is hot, so you may have a bad pump driver through the control board or bad wire. Most likely the main board.
- AV Repair Help answered 11 years ago
See video link
https://www.appliancevideo.com/maytag-pavt234aww-washer-diagnostic-repair-not-completely-spinning-out-loud-noise-at-end-of-spin/
DIAGNOSTIC TEST
Entry modes:
n Universal mode across all products using a sequence
of any three buttons. It displays error history prior to entry
into service diagnostic.
Operation modes:
n Display of the error states that have been recorded
by the washer.
n Run through of an automated test.
n Clearing of error codes.
Starting Service History Mode & Diagnostic Test:
NOTE: The washer must be empty and the control must be
in the OFF state before pressing the touch-pad sequence to
start the test.
1. Close the door.
2. Select any three different keys (except POWER).
Individually press these in a sequence of 1, 2, 3 and then
repeat this sequence two more times. This sequence must
be completed within 8 seconds of the first key press.
These three keys are referred to the 1st, 2nd, and 3rd keys,
based on the order pressed.
NOTES:
After the washer displays the first error, additional presses
of the 3rd key will advance through the errors from newest
to oldest. After clearing the error codes, service diagnostics
shows 88 in the display (on models with a display) or WASH
LED remains on (on models without a display) until diagnostic
is exited or any other mode is activated. Diagnostic mode
can be exited by pressing and holding the 1st key for 5
seconds OR by pressing POWER. After the diagnostic test
has finished, unplug washer or disconnect power cord
and wait for 15 seconds. Then plug in washer or reconnect
power.
NOTES :
- Upon entry into service diagnostics, the console will beep
(if available) and all console LED lights will turn on for
5 seconds. - Any error codes will be displayed in the Estimated Time
Remaining display. If there are no error codes stored,
88 will be displayed. On models without a display, the
WASH LED will flash to indicate the error code. If there
are no error codes stored, the WASH LED remains on.
NOTE: This program recalls the most recent error code first. -
After entry into service diagnostics using the 1st, 2nd, and
3rd keys, each of these keys will have unique functions
regarding service diagnostics as detailed in the following -
Check that the washer is plugged into a working outlet and for blown fuses.
- Verify that the plug doesn’t have two adapters attached to it.
- Unplug washer or disconnect power.
- Disconnect green connector (IF2) from the CCU.
- Plug in washer or reconnect power.
- Check that there is voltage of 120v at the CCU terminals (IF2).
- If no voltage is observed, unplug washer or disconnect power.
- Check that the connections of the power cord to the line filter
(white-neutral/black-line) and to the CCU (IF2) are not broken
or with wires detached. - Check continuity from the RFI filter connector to the CCU
(IF2 cavity connector). - Plug in washer or reconnect power.
- Check for power going to Central Control Unit (CCU) by listening for a
click in the CCU when unit is plugged in. If no click, replace CCU. - Check the touch-pad/LED assembly by selecting different cycles and
changing the modifiers and options available to confirm the
touch-pad/LED assembly is responding. - Verify washer operation by running a Service History Mode & Diagnostic
- AV Repair Help answered 11 years ago
Hi. I would check your belt switch as well as the hi limit t-stat and fuse on the burner tube. Also, the thermistor. Does this unit give an error codes? I have attached many Samsung dryer repair videos.
- Brian, Ace Appliance answered 11 years ago
Hi. The F11 error code is a communication error code between your CCU and MCU. If the CCU did not fix the issue you either have a bad wire connection or a bad MCU. I have attached a video on the F11 error code.
- Brian, Ace Appliance answered 11 years ago
- last active 11 years ago