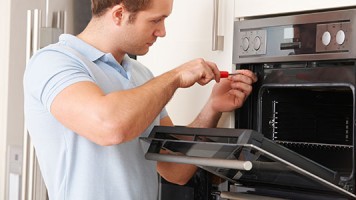
Hi. I have got some information on this microwave for you. It looks like this is a counter top model. There is a one year manufacture warranty on it. The serial number of the product is listed on the same sticker the model number is on, and is usually located on the cabinet wall inside the microwave. The information listed on this unit from the manufacture is as follows.
**For Your Information:
Warranty on the models listed is a one year Total Replacement Warranty if the
product has failed. (The only parts that are available are the turntable, turntable
hub, turntable support, and on some models: the cabinet feet. These part
numbers are available in the Use & Care Guide). There are no other replacement
parts available for these models and these models have no service warranty. If
you are called to service these machines “do not schedule a service call”. You will
not be paid unless special authorization is provided.
I hope this was helpful to you!
- Brian, Ace Appliance answered 12 years ago
Hi. Sounds like the bearing in the fan motor may be going bad. If you made sure the fan bracket is not bent and is secure as well as the fan blade. Is the blade adjustable, or have a nut the holds the blade on? If you could provide me with the proper model number I will be able to further assist you. Model number should be located around the cabinet where the door opens or if this unit has a bottom drawer that pulls out it will be located cabinet after the door is pulled out.
- Brian, Ace Appliance answered 12 years ago
Ok Brian I ran the diagnostics and none of the fans came on only the damper. at the end of everything (6) I pushed the up button on the freezer side and it displayed 7/5
I then closed the doors and it reset as expected.
So what is 7/5? and where the heck is the relay, I found the capacitor plugged into the side of the compressor , is the relay that part the capacitor is plugged into or does this unit even have one?
model number mff2557heb
Thanks for walking me through this,
Drew
- Drew answered 12 years ago
Here is the Diagnostic tests for your unit. You will be able to turn on the fans and compressor from these tests. If you compressor is warm, it must be getting some kind of voltage to it. Also, your tech sheet that has this information on it is usually located under the toe panel. If you take the toe panel off in the front of the unit it may be tucked inside it or in a plastic bag on the cabinet under it.
Service Test Mode:
The service test functions are performed using the refrigerator display and keypad. Enter the Service Test Mode
by performing the following sequence of events:
1. Hold the refrigerator door light switch closed.
2. Press the Refrigerator Temperature Up keypad 3 times consecutively.
Note: The 3 Keystrokes must be done consecutively and within 10 seconds.
3. Release the refrigerator door light switch.
4. The control will display SE to confirm entry into the service mode.
Freezer Refrigerator
S/E
5. Entry to the Service Menu is confirmed by pressing the Refrigerator Up key once more.
6. The control will display its software version for 3 seconds.
Freezer Refrigerator
2/5
7. Following the software revision display the freezer display will read the first test number in the
diagnostic tree. The refrigerator display will be blank.
Freezer Refrigerator
1/
Note: All control functions will be turned off (Compressor, Defrost, Evaporator Fan, the damper will
remain in its current position).
8. You are now in the SERVICES TEST operational mode and may use the diagnostic tests.
The Service Test Mode can be exited at any time by closing the Refrigerator Door(s). Service Specifications
Service Test 1 – Defrost Thermostat & Defrost Circuit Test
When selected this test will display the state of the defrost thermostat. In order to perform this test the defrost heater will
be energized. The test is activated and deactivated using the Refrigerator Up key. Once activated, this test must be
deactivated to move to another test number. The Freezer Up / Down keys allow selection of the test to be
performed.
This test also allows observation and measurement of proper defrost function. You can observe defrost heat and voltages
while the test is activated.
Freezer Refrigerator
1/O
DEFROST THERMOSTAT OPEN
Freezer Refrigerator
1/ S
DEFROST THERMOSTAT SHORTED (CLOSED)
Service Test 2 – Compressor/Condenser Fan Test
When selected and activated this test will operate the Compressor/Condenser Fan circuit. You should evaluate proper
operation of the compressor and condenser fan. The Refrigerator Up key will toggle between “O” / “F” (ON & OFF)
the compressor drive circuit. The test must be “deactivated” or in the OFF position to move to another test selection.
Freezer Refrigerator
2/O
Freezer Refrigerator
2/F
OBSERVE COMPRESSOR & CONDENSER FAN FUNCTION
Service Test 3 – Evaporator/Freezer Fan Test
When selected and activated this test will operate the freezer fan. The Refrigerator Up key will toggle between “O” /
“F” (ON & OFF) the fan drive circuit. You will have to inspect the fan for proper function. The test must be “deactivated” or
in the OFF position to move to another test selection.
Freezer Refrigerator
3/O
Freezer Refrigerator
3/F
OBSERVE FAN OPERATION Service Specifications
Service Test 4 – Fresh Food Thermistor Test
When selected and activated this test will display Pass, Open, Short result for a test on the Fresh Food Thermistor
circuit as shown below. The test is activated and deactivated via the Refrigerator Up key, and must be
deactivated to move to another test selection.
Freezer Refrigerator
4/P
PASS RESULT
Freezer Refrigerator
4/O
OPEN RESULT
Freezer Refrigerator
4/S
SHORT RESULT
Service Test 5 – Freezer Thermistor Test
When selected this test will display Pass, Open, Short result for a test on the Freezer Thermistor circuit as
shown below. The test is activated and deactivated via the Refrigerator Up key, and must be deactivated
to move to another test selection.
Freezer Refrigerator
5/P
PASS RESULT
Freezer Refrigerator
5/O
OPEN RESULT
Freezer Refrigerator
5/S
SHORT RESULT
Service Test 6 – Open Damper Test
When selected this test will indicate the current position “O” / “C” (OPEN / CLOSED) of the refrigerator damper. The
Refrigerator Up key will toggle the damper open and closed. You must allow 1 minute for each attempt to change
the damper position. You should observe proper damper function.
Freezer Refrigerator
6/O
Freezer Refrigerator
6/C
OBSERVE DAMPER FUNCTION
- Brian, Ace Appliance answered 12 years ago
Hi. It looks like your display board is plugged into the zodiac control and then the zodiac control gets plugged into the main power board you replaced. So power comes from the main board and goes to the zodiac control and then to the display board. So if your sure your not getting power to the display board, check and see if your getting power to your zodiac control. If your getting power to the zodiac control then this would be your problem. The zodiac control is not sending the power to your display. Check your wiring and connections first before replacing the board. I have attached a link for the control. Let me know if you need further assistance.
- Brian, Ace Appliance answered 12 years ago
Ok so the compressor is hot but not working no blowers or fans either. Is there a diagnostics I can run off the control board?
- Drew answered 12 years ago
Hi. If the unit came on and the fans are running after programming the new board, it sounds like you programmed it correctly. I would check to see if the control board is sending proper voltage (120 v) to the compressor. If you have proper voltage to the compressor and its not running it could be the start components of the compressor or the compressor it self that is faulty. If you need further assistance please let me know.
- Brian, Ace Appliance answered 12 years ago
The most common thing I see with these washers when they get loud in spin is a faulty tub bearing. Many times people describe it as a jet or plane taking off. It gets louder as the faster it spins. If you look under the washer you may find some water or see a brown stain on the components from where water has been leaking and spraying as it spins. Replacing the tub bearing is a good amount of time and work. It is also costly and requires a special bearing tool. If you need any further assistance please let me know.
- Brian, Ace Appliance answered 12 years ago
Hi. The fuse is not bad if the control panel lights up. When the fuse goes bad nothing on the dishwasher will work. Sounds like you have other issues going on. First I would turn off power to the unit for 5 mins and turn back on to reset the control. See if this takes care of the issue. If not, the tech sheet for the unit should be located on the back side of the toe panel and will tell you how to put the unit into a diagnostic mode as well as troubleshooting information. Just let me know if you need any further assistance on your dishwasher.
- Brian, Ace Appliance answered 12 years ago
Hi. Once the washer fills with water and should be in a wash cycle to where the wash motor should be running check for a 120 V at the washer motor. If you are getting 120 V to the wash motor and its not working then you have something preventing the impeller from rotating or a bad wash motor. If your not getting proper power to the motor, check your wiring between the motor and control board. If the wiring is good then you have an issue with the control board. Let me know if you need any further assistance.
- Brian, Ace Appliance answered 12 years ago
Elle, if you went through the Allen wrench step, and the unit is very hot. The next step would be to rebuild or replace the disposer. you can call our parts department at 1-800-830-5465 for a rebuild kit and we sell new units with same day shipping on both. Matt Ace technician
- AV Repair Help answered 12 years ago
Cindy, not spinning with the lid lock light blinking is a strong indication of a defective lid switch. See the parts link below.
http://appliancepartsandvideo.partsquik.com/catalogsearch/result/?q=W10404050+
- AV Repair Help answered 12 years ago
Artie #1: Open the freezer and view the status of led
(STATUS LED)
2 BLINKS FOLLOWED BY 1 SEC. DELAY(REPEATED)
POSSIBLE CAUSES: The flapper door on the emitter is blocking the beam or the optics are faulty.
2: Press the emitter flapper to unblock the optics beam
(STATUS LED)
2 BLINKS FOLLOWED BY 1 SEC. DELAY(REPEATED)
POSSIBLE CAUSES: The optics are faulty. Replace the emitter and receiver boards.
You can call our parts department at 1-800-830-5465 for any parts needed
- AV Repair Help answered 12 years ago
Ron, the dispenser board part number now cross references to this new part number WR55X10063. Call our parts department at 1-800-830-5465 for same day shipping. I have also included a link below to the breakdown of how this unit comes apart. At this time we do not have a video on it. I hope this helps . Thanks Matt Ace technician
- AV Repair Help answered 12 years ago
Hi. It sounds like what you are referring to as the clutch is the pulley( wheel on back of tub that belt attaches to). Sounds like your pulley nut came loose and came off. You will need to find the pulley nut that must have fell off as well. Inspect the pulley, nut, and belt. If any parts looked damaged you will need to replace them. Also, inspect the rear of the tub and make sure that the pulley did not rub and cause a hole in the outer tub. When installing the pulley nut you can apply some thread sealant to prevent the nut from coming loose again. I have attached a link for belt replacement video and link to purchase the belt. If you needs any other links for other parts please let me know. I hope this has been helpful.
- Brian, Ace Appliance answered 12 years ago
Les, is it ice on the bottom of the freezer floor or frost on the coil ? If its ice on the floor call or parts department at 1-800-830-5465 and give them your model number MBF2258XEB4 and the will check on the drain kit. Thanks Matt Ace Technician
- AV Repair Help answered 12 years ago
Melissa, below is a link for your belt information and clutch. It gives you a complete breakdown by your model. Matt Ace Service technician
- AV Repair Help answered 12 years ago
Hi Brian – You were 100% correct in your assumption. I had not thought to check the outside duct. Since i have not lived at this new residence for too long… the outside duct must have been mostly clogged for a while. I cleaned the outside duct and had previously cleaned the inside of the dryer… the duct exhaust… had been getting clogged in 2 different locations for a while. The lack of airflow through the dryer was causing a low heat condition to occur; and it must of been perhaps short cycling. The nice thing is that no parts were required at this time and no further diagnostics are needed. It was just a matter to reassemble the unit and ensuring that the wiring was reconnected.
Thanks for your help !!!
Fred / Lubbock, TX
- Fred answered 12 years ago
I have found what you are looking for. Here is the link for the service manual on these units. Let me know if this has been helpful.
- Brian, Ace Appliance answered 12 years ago
Hi. I do not see a model number attached to this post. With a valid model number and some more information I will be able to further assist you. Is the refrigerator section or the freezer section too cold? Does the unit run non stop or shut on and off? A lot of different things can cause this issue you are having.
- Brian, Ace Appliance answered 12 years ago